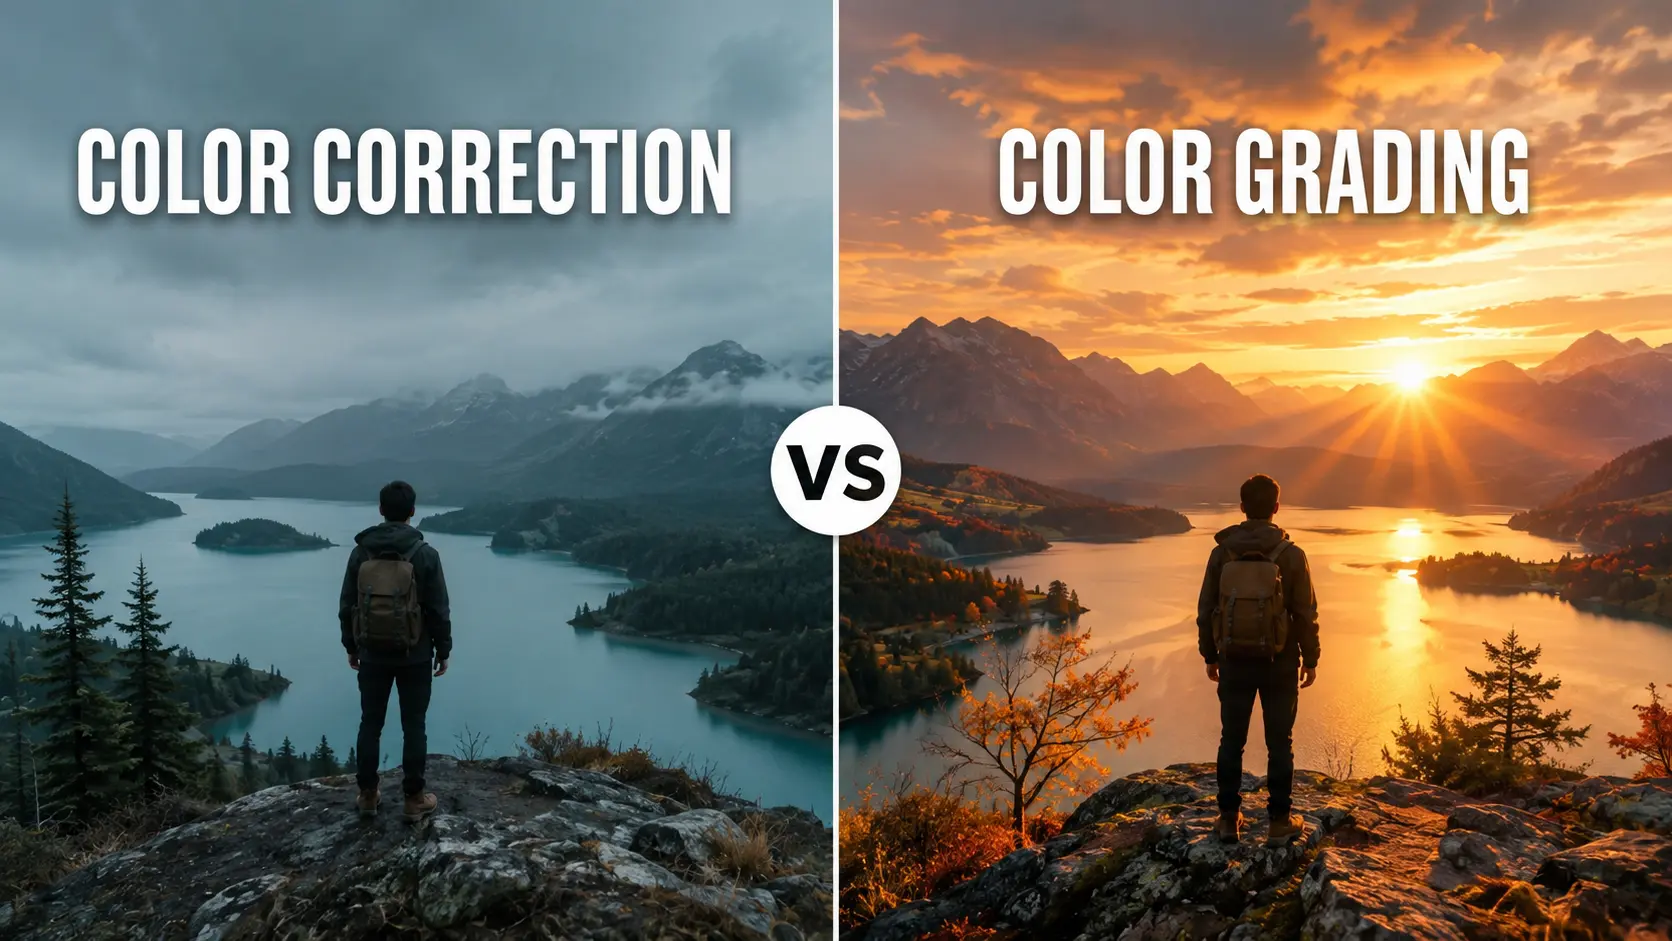
If you have spent any time editing a video or restoring a photo, the terms colour grading and colour correction are not new to you. Many editors use these terms interchangeably, but they are genuinely different. The difference is not just a technical exercise. It is the matter of visual quality at the end. Colours set the mood, tone, and atmosphere. From a high-contrast scene that builds suspense to a warm glow that adds emotional richness, colour tells a story beyond the scenic details.
Get the colour editing sequence right, and you have a cinematic masterpiece.
Get it wrong, and even professional-grade editing falls flat.
Understanding colour correction vs colour grading is the most important distinction in post-production, and one of the most commonly confused. This guide covers what colour correction actually is, how it differs from colour grading, how the same principles apply to image colour work (including colourising old black-and-white photos), and how AI tools are transforming both processes for creators who no longer have hours to spend on manual colour work.
What Is Colour Correction in Video?
Video colour correction is the process of cleaning up raw footage and ensuring the colours look natural and accurate. This post-production process removes lighting inconsistencies, fixes camera settings, balances colours, and resolves colour temperature inaccuracies.
In simpler terms, video colour correction is like resetting the captured footage and replicating exactly what you saw on set.
Most video editors regard this as a process to make video look more natural and realistic rather than adding cinematic flair to it. Colour correction is done clip by clip or shot by shot. Each shot is treated individually because no two video shots have the same colour irregularities. The first shot might be overexposed, the next one has a heavy blue cast, and the last one might have an inaccurate white balance setting.
What does colour correction actually fix?
Overexposed or underexposed shots, bringing brightness and contrast back into a normal range
White balance errors, removing yellow casts from tungsten light or blue casts from shade
Inconsistent exposure across multi-camera shoots, so cuts do not feel jarring
Skin tone accuracy, ensuring people look natural and realistic on screen
Colour space issues, converting LOG or RAW footage into a usable working format
The same principles apply to image colour correction. When you fix the exposure on a photo, correct a colour cast, or balance skin tones, you are doing image colour correction. It is the same technical process applied to a single frame rather than a video sequence.
What Is Colour Grading in Video?
Colour grading is the next step after colour correction in the video editing process. Once colour is consistent and technically accurate, colour grading enhances the mood, tone, feeling, and style of the video.
In short, colour correction is fixing inaccuracies. Colour grading is about making those fixes intentional. This is where colour sets the visual tone. A horror film has deep shadows and desaturated midtones. A warm lifestyle brand video boosts golden tones in the highlights and adds a subtle vignette. A documentary looks professionally journalistic with clean, controlled contrast. None of these colour adjustments are prescribed for a specific genre, but they are creatively purposeful.
Unlike video colour correction, colour grading is done at the scene level rather than individual shots or clips. You start by building a look using a LUT (look-up table), colour wheels, or custom curves. Then you apply that grade across sequences to maintain visual consistency throughout the project.
What does colour grading actually fix?
Genre-specific looks: cool and desaturated for thrillers, warm and golden for romance, high contrast for action
Brand-consistent aesthetics: the same visual fingerprint across every video in a series
Emotional tone reinforcement: warm tones evoke nostalgia and comfort, cool tones suggest tension or detachment
Signature filmmaker styles: from the teal-and-orange Hollywood blockbuster look to vintage film grain aesthetics
Narrative coherence: visual cues that signal flashbacks, dream sequences, or shifts in time
Colour grading transforms raw footage into intentional visual work. The same is true of image colour grading, whether you are stylising a portrait for a specific editorial mood, matching a brand palette across a full campaign, or applying a signature look across every photo in a series.
What Are LUTs in Colour Grading?
A LUT (Look-Up Table) is a file that maps one set of colour values to another. It is the primary tool used to apply a consistent colour grade across an entire project. Rather than manually adjusting every colour parameter on every clip, a colourist applies a LUT and the transformation happens instantly across all selected footage.
LUTs come in two types:
Technical LUTs handle colour space conversion, converting LOG or RAW footage from a camera's flat, low-contrast recording format into a standard display colour space. These are applied during colour correction, before any creative work begins. They are not aesthetic choices. They are technical requirements for footage shot in LOG or RAW.
Creative LUTs apply a stylistic look to colour-corrected footage: the warm orange-and-teal of action films, the desaturated cool palette of thriller dramas, the soft high-key look of romantic comedies. These are applied during colour grading and represent aesthetic decisions rather than technical corrections.
Using LUTs correctly requires one rule: always apply a creative LUT to colour-corrected footage, never to raw or uncorrected footage. A LUT applied to inconsistently exposed or white-balanced clips will amplify those inconsistencies rather than correct them.
What Is the Difference Between Colour Correction and Colour Grading?
At the surface level, both colour grading and colour correction adjust colours in visual content. Both can be done using the same editing software. So how do they differ? Here is a side-by-side breakdown of key differences.
Colour Grading vs Colour Correction: Side-by-Side Comparison
Aspect | Colour Correction | Colour Grading |
Purpose | Fixes technical issues | Creates mood and style |
Stage | Always first | Always second |
Scope | Clip by clip | Scene or full project |
Output | Neutral, accurate | Stylised, intentional |
Nature | Technical and objective | Creative and subjective |
Edits | Should go unnoticed | Defines the visual craft |
Colour Correction vs Colour Grading: A Detailed Analysis
1. Purpose: Fixing Problems vs Creating a Look
The most fundamental difference between the two processes is what they are trying to achieve.
Colour correction fixes what is technically incorrect. It adjusts exposure, colour cast, lighting, shadows, hues, contrast, and more. Colour correction restores what the shot actually looked like in real life. The goal is to enhance realism and maintain a natural look before moving forward to creative fixes.
Colour grading builds a mood. It shapes how viewers feel once the colours are corrected and consistent. Colour grading is a stylistic enhancement to visually consistent footage.
Colour correction asks "does this look real?" while colour grading answers "does this fit the story?"
2. Order: Correction Always Comes First
No professional or amateur editor should ever break this rule: colour correction always comes before colour grading. The processes must be followed in this order, not interchangeably. This sequence is a technical requirement, not an editor's choice.
When you colour grade footage without colour correction, slight inconsistencies and subtle variabilities become more obvious. For example, a slightly underexposed shot becomes muddy after a stylistic LUT amplifies the shadow detail issues.
With colour correction, you create a neutral baseline that simplifies and improves colour grading. Even if you plan to apply a heavy stylistic grade, your footage needs to be technically neutral before any creative colour work begins. This is the single most common mistake self-taught editors make.
3. Nature: Technical vs Non-Technical
Colour correction deals with the technical aspects of editing and must achieve a specific result upon finalisation.
Colour grading is mostly a creative choice and depends on the editor working on the project.
Two editors working on the same colour correction task should create a similar neutral baseline. The same two editors can produce two completely different colour grades working on the same corrected footage.
This distinction is crucial because it defines who makes the decisions. Colour correction requires technical knowledge. Colour grading requires understanding the director's vision, the brand's identity, or the story's emotional arc, and translating that into colour.
4. Workflow: Shot by Shot vs Entire Scene
Colour correction is a clip-by-clip editing process. It fixes errors in individual shots and ensures the footage flows naturally.
Colour grading is done at the scene level. Once shots and clips are fixed, a colour grade is applied thoroughly across the scene. It ensures the desired mood or tone is coherent throughout the video.
In practice, colour correction takes more time. Colour grading can be applied quickly once the desired look is decided.
5. Edits: Seamless vs Recognisable
Good colour correction often stays imperceptible. If a viewer notices the clean-up, the colour correction was not done right. The adjustment should not draw attention. Everything should remain consistent, and viewers should not be thinking about colour inaccuracies while watching.
Colour grading is done intentionally to set a certain style. It defines the creative identity and becomes a core part of the aesthetic. Think of Wes Anderson's films, characterised by pastel palettes and candy-coloured hues like The Grand Budapest Hotel.
The two processes require completely different mindsets. Colour correction is a craft of restraint where the goal is to remain unnoticed. Colour grading is a craft of expression where the goal is to leave a mark.
Where Image Colourisation Fits Into the Colour Workflow
Colour correction and colour grading assume your source material already has colour. But what about black-and-white images that need colour added in the first place? This is where AI colourisation tools like the Image Colourizer come in.
Image colourisation is a distinct process from correction or grading. Instead of adjusting existing colour, the AI predicts what colours should exist based on trained knowledge of skin tones, foliage, sky, fabrics, and thousands of other real-world elements. Upload a black-and-white photo, and the AI generates a colour version that looks natural and historically appropriate.
Where colourisation genuinely earns its place in the colour workflow:
Restoring old family photos: Black-and-white portraits of parents, grandparents, and historical family moments regain their emotional depth when colour is added respectfully.
Modernising archive material: Historical photos, documentary source material, and old editorial content become more accessible to modern audiences when colour is added.
Bringing vintage aesthetics to life: Old advertising, historical brand assets, and vintage editorial photography benefit from thoughtful colour restoration.
Content creation source material: Old images that would otherwise be unusable in modern content become usable when colour is added carefully.
After colourisation, the same principles of colour correction and colour grading apply. You correct any inconsistencies in the AI-generated colour output, then grade the image to match the aesthetic of the wider project it is being used in. Colourisation gives you a starting point. Correction and grading make it fit.
For a wider look at restoring old photos beyond colourisation alone, our Best Apps to Restore Old Photos guide covers the full restoration workflow including damage repair and clarity enhancement.
Colourise Old Photos Free on Templix
How AI Is Transforming Video and Image Colour Work
AI tools for colour correction, colour grading, and image colourisation have reduced the time each stage takes. Tasks that once required manual adjustment can now be done in minutes. While AI accelerates the process significantly, human creativity remains pivotal for the grading decisions that define visual identity.
AI for Video Colour Correction
Because video colour correction is a time-consuming technical process, AI tools are highly effective here. AI can fix white balance, contrast, exposure, hues, saturation, and inconsistency across footage. It keeps footage natural and balanced while automating adjustment. The AI analyses lighting, colour distribution, contrast, and other technical issues to create a clean baseline.
Instead of manually fixing each shot and clip, AI video colour correction can:
Balance exposure across scenes automatically
Maintain natural skin tones without manual intervention
Achieve accurate white balance based on scene lighting
Maintain consistent colour between clips across an entire timeline
AI for Video Colour Grading
Video colour grading is more creative and requires human input. While AI grading tools can add stylistic visuals, apply filters, or achieve cinematic looks, the creative direction still needs a human editor with vision for the specific story or brand.
In colour grading, AI helps editors experiment with different tones and aesthetics faster than manual grading allows. It lets creators explore multiple looks before finalising the visual style, which compresses the iteration cycle significantly.
AI for Image Colourisation and Colour Work
The Templix Image Colourizer handles the colourisation step by predicting appropriate colours for black-and-white images. Once colour is added, other Templix image tools handle the correction and grading side of the workflow. The Image Editor applies prompt-based colour adjustments, and the AI Image Upscaler delivers print-ready 4K output for the final image after all colour work is complete.
For a deeper look at structured prompting that consistently produces cleaner colour work across every generation, our JSON Prompting for AI Image Generation covers the structured approach that outperforms free-text prompts.
The best results come from combining approaches: AI handles the mechanical parts of correction and colourisation, while human creativity drives the grading decisions that give the project its distinctive visual identity.
When to Use Colour Correction, Colour Grading, or Colourisation
Knowing when to use each process as a standalone endpoint versus a continuous workflow directly determines the quality of the final result. The short answer: colour correct first, colour grade second, and colourise beforehand if your source is black-and-white. But knowing when each is the endpoint changes how you approach the whole workflow.
Use colour correction as the endpoint when:
The project requires technical accuracy above creative style: news, documentary, corporate interviews, instructional content
Footage will be broadcast on platforms with strict colour standards (broadcast TV, medical, legal recordings)
The goal is to make footage look like natural reality, not a crafted visual experience
You are handing corrected footage to another editor who will apply their own grade
In these cases, colour correction is the deliverable. The work is done when footage looks natural, consistent, and technically accurate.
Use both colour correction and colour grading when:
The project has a defined visual tone: narrative films, music videos, branded content, social media series
The footage needs to communicate emotion through colour: warm for safety and nostalgia, cold for tension and isolation, desaturated for documentary realism
You are building a visual identity across multiple episodes, videos, or a campaign where consistency across releases matters
The story requires visual distinction between timelines, locations, or emotional states
Use colourisation as the first step when:
Your source material is black-and-white and needs colour added before any correction or grading work
You are restoring old family photos, documentary source material, or historical archive content
You are producing modern content that incorporates vintage source material and needs it to fit with contemporary colour output
You are recreating a historical scene for a period-piece project where black-and-white source is being adapted for modern viewers
The practical rule: if you are asking whether the footage looks right, you are doing colour correction. If you are asking whether the footage feels right, you are doing colour grading. If you are asking what colour should exist in the first place, you are doing colourisation. All three questions may need answering before the project is finished.
Colour Grading vs Colour Correction: Common Mistakes
Even experienced editors fall into these traps, and AI tools, for all their power, will not protect you from them if the fundamentals are wrong.
Skipping colour correction: One of the most common mistakes is starting colour grading without fixing inconsistencies first. This becomes very difficult to fix later, because the grade amplifies problems it should be masking.
Overusing LUTs or AI filters: Without a corrected base, adding LUTs or AI filters compounds existing technical problems rather than resolving them.
Ignoring skin tone: Skin tone is one of the first things viewers notice, and it should be the first thing fixed during colour correction. Everything else builds on this baseline.
Applying heavy grades to low-quality footage: Working with compressed video or low-bitrate footage means heavy colour grades produce compression artefacts and reduced visual integrity. Match your grade intensity to your source quality.
Confusing colourisation with correction: Adding colour to a black-and-white image is not the same as adjusting existing colour. Treat colourisation as its own step, then correct and grade the result the way you would any other coloured source.
Ready to Master Colour Correction, Grading, and Colourisation?
With video and visual content dominating the internet, understanding the fundamentals of colour correction, colour grading, and image colourisation is essential for modern post-production. Correct first, grade with intention, and colourise where needed. Let the AI tools do the heavy lifting while you focus on the work that matters: telling a story worth watching.
The Templix Image Colourizer is a strong starting point for adding colour to black-and-white photos, and the wider Templix creative suite covers the correction, grading, and refinement work that turns raw AI output into finished visual content. Free credits on signup mean you can test the full workflow at no cost before committing to a paid plan.
Start Colourising Photos Free on Templix
Frequently Asked Questions
What is the difference between colour correction and colour grading?
Colour correction fixes technical colour issues like white balance, exposure, and colour casts to make footage look natural. Colour grading applies a stylistic look on top of corrected footage to build mood, tone, or brand identity. Correction is technical and should stay invisible. Grading is creative and defines the visual style.
Which comes first, colour correction or colour grading?
Colour correction always comes first. This is a technical requirement, not an editor's preference. Grading a shot that has not been corrected amplifies existing colour problems rather than fixing them. Correct the footage to a neutral baseline first, then apply your creative grade on top.
What is the Templix Image Colourizer?
The Templix Image Colourizer is an AI-powered tool that adds realistic colour to black-and-white photos. Upload a black-and-white image, and the AI predicts natural colours for skin tones, foliage, sky, fabrics, and other elements to produce a full-colour version that looks historically appropriate rather than artificially tinted.
Is the Templix Image Colourizer free to use?
Yes. Templix offers free credits on signup so you can test the Image Colourizer and every other tool on the platform at no cost. Paid plans unlock higher credit volumes and priority processing for users colourising larger photo collections or working on ongoing projects.
Can I use the colourised images commercially?
Yes. Images colourised through Templix are available for commercial use across editorial content, family history books, print reproductions, gift products, marketing campaigns, and any other commercial application. You retain full ownership of both your original photo and the colourised version.
How is colourisation different from colour correction?
Colour correction adjusts existing colour to be accurate. Colourisation adds colour to images that do not have any (typically black-and-white or sepia). They are separate steps. If you colourise an image, you then apply colour correction to any inconsistencies in the AI-generated output, and finally apply colour grading if the image needs to match a specific aesthetic.
What kinds of photos work best with the Templix Image Colourizer?
Clear black-and-white or sepia photos with good tonal range produce the strongest colourisation results. Portraits, family photos, landscape shots, and historical images all work well. Extremely damaged, heavily degraded, or very low-resolution source images are the hardest cases, and often benefit from a photo restoration pass before colourisation.
Should I restore old photos before or after colourising?
Restore first, colourise second. Fixing scratches, damage, and fading before colourisation gives the AI cleaner information to work from, which produces significantly better colour results than colourising a damaged source. For the complete restoration workflow, pair the Image Colourizer with the Photo Restoration app .
Can AI fully replace human colourists for colour grading work?
No. AI is highly effective for the technical parts of colour work (correction, colourisation, batch adjustments) but grading remains a creative decision that requires human judgement. The best workflow combines AI for the mechanical parts and human creativity for the grading choices that define the project's visual identity.
What is the biggest advantage of using AI for colour work?
Speed and iteration. What used to require hours of manual correction and grading can now happen in minutes. For creators, this compression means you can test five or ten different colour approaches in the time it used to take to produce one, which improves both the quality of the final decision and the volume of content you can publish.

Zain Abbas
Zain Abbas writes Templix's technical and enterprise content, from developer tooling and MCP servers to team workflows, product guides, and AI app integrations.