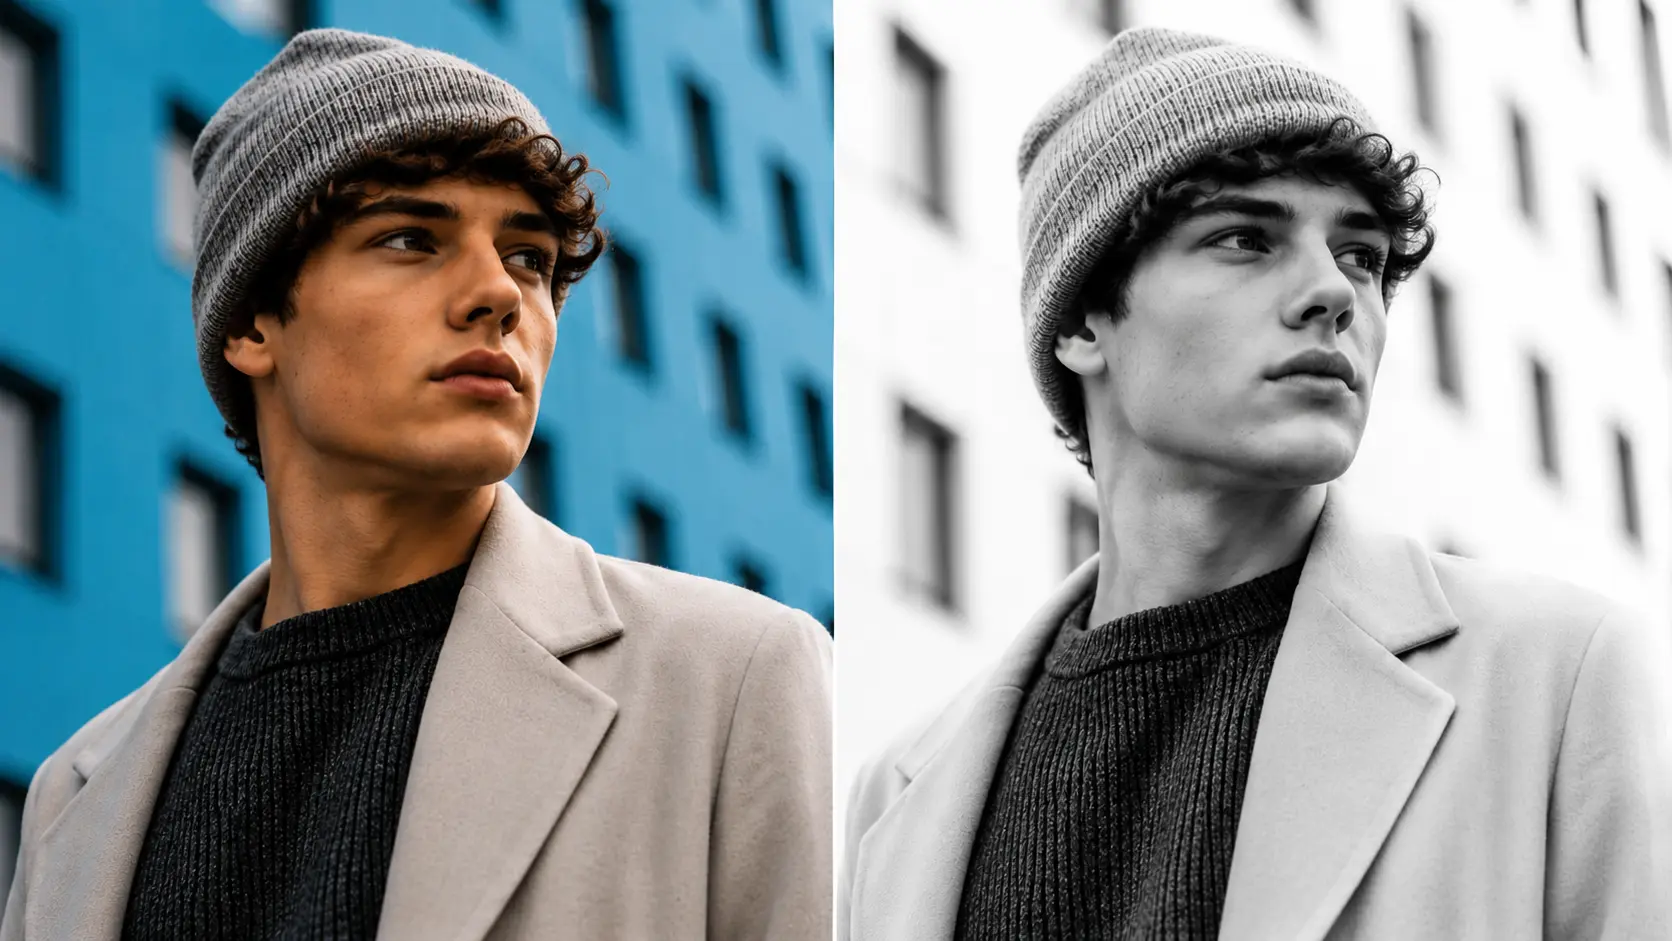
Some photos are worth more than the frames they sit in. A black-and-white portrait of your grandfather in his twenties. A family wedding shot from the 1950s. A vintage travel photo from a trip your parents took before you were born. These images carry the weight of history and family memory, but they exist in a visual language that feels increasingly distant from how we experience the world today.
For decades, adding colour to a black-and-white photo required painstaking manual work by a skilled retoucher. Hours of digital painting, careful colour selection based on historical context, and careful blending to make the result look natural rather than artificial. It was possible, but it was expensive and slow, which meant most old family photos stayed in black-and-white for the same reason most people never restored damaged photos: the cost outweighed the perceived benefit.
AI-powered colourisation has genuinely changed this. What used to take hours now takes seconds. What used to cost hundreds of dollars per photo now costs a fraction of a cent per generation. The Templix AI Image Colorizer sits at the front of that shift, and this guide covers everything you need to know about how it works, what it does well, and how to get the best results out of it for your specific images.
What Is the Templix AI Image Colorizer?
The AI Image Colorizer is an AI-powered tool that adds realistic colour to black-and-white and sepia photos. Upload an image, and the AI predicts the appropriate colours for skin tones, clothing, foliage, sky, architecture, water, and every other element in the photo, then generates a full-colour version that looks natural rather than obviously tinted.
The tool sits inside the wider Templix creative suite, which means colourised images can flow directly into other Templix workflows without moving files between platforms. Once the image is in colour, you can restore damage, upscale to print resolution, remove backgrounds, or extend the wider photo restoration workflow all within the same environment.
What distinguishes the Templix Image Colorizer from earlier generations of AI colourisation tools is realism. Older colourisation approaches applied colour uniformly across areas the AI could not confidently identify, which produced results that looked technically coloured but felt flat and unconvincing. Modern AI colourisation, including the Templix version, understands context deeply enough to apply different colours to different elements even when they occupy similar areas of the image, producing results that read as genuine period colour photography rather than a black-and-white photo with a colour filter applied over it.
Free credits on signup mean you can test the tool on your own photos at no cost before committing to a paid plan. That matters especially for colourisation because the value of the tool depends on how well it handles your specific images, not on how well it handles generic test photos in a demo video.
How AI Photo Colourisation Actually Works
Understanding how the colourisation model works helps set the right expectations for what you can and cannot ask it to do.
The AI has been trained on millions of colour photographs paired with their black-and-white equivalents. During training, the model learned the statistical relationships between visual patterns and their most likely colours. Skin tones fall in a predictable range. Sky is almost always blue with specific tone variation for weather and time of day. Grass and foliage cluster around green with seasonal variation. Wooden furniture, cotton fabric, brick walls, metal surfaces, and thousands of other elements all have colour distributions the model has learned to recognise.
When you upload a black-and-white photo, the AI runs three stages. First, it segments the image, identifying which regions represent which types of objects. Second, it predicts appropriate colours for each region based on the visual pattern it recognises. Third, it blends the predicted colours into the black-and-white image in a way that preserves the original lighting, shadow direction, and tonal contrast so the result looks like a genuine colour photograph rather than an obviously coloured overlay.
The colour predictions are statistical, not definitive. The AI predicts the most likely colour for a given visual pattern rather than the exact historical colour of the specific object in your photo. For a grass field, that means the AI will confidently predict green even though it cannot know the exact shade. For a shirt, the AI will predict a colour based on the shirt's shape, texture, and context in the photo, but that colour may not match what the person was actually wearing on the day.
This is important to understand because it defines the tool's ceiling. The AI produces photos that look historically plausible and emotionally resonant, but it cannot recover colours that were never captured. For most family photos, this is exactly what you want. For photos where historical accuracy of specific colours matters (military uniforms, sports team kits, specific brand marketing materials), the tool still produces useful output but treats the output as a starting reference rather than definitive historical documentation.
Key Features of the Templix Image Colorizer
Six specific capabilities define what the Templix Image Colorizer does well:
Contextual colour prediction: The AI understands what different elements in a photo are, then applies colours appropriate to those elements rather than a single tint across the whole image. This is what separates modern AI colourisation from earlier filter-style tools.
Skin tone accuracy: Human faces are the element viewers scrutinise most, and unrealistic skin tones are the fastest way to make a colourised photo look artificial. The Templix Colorizer specifically emphasises realistic skin tone rendering across different ethnicities and lighting conditions.
Original detail preservation: The colourisation preserves the sharpness, contrast, and detail of the source image rather than smoothing or over-processing the result. Fine details in fabrics, textures, and facial features stay intact through the colourisation process.
Support for multiple photo types: Portraits, group shots, landscapes, urban scenes, indoor photos, and outdoor photos all work. The AI adapts its colour prediction approach based on the scene type rather than applying one approach to every image.
Fast processing: Most colourisations complete within a few seconds per image, which makes the tool practical for processing entire family photo collections rather than just individual images.
Commercial-use output: Colourised images are available for commercial use across editorial content, family history publications, print reproductions, gift products, and any other commercial application. Users retain full ownership of both the original photo and the colourised version.
Use Cases for the Templix Image Colorizer
Six specific use cases consistently produce strong results with the Templix Image Colorizer.
Restoring old family photos: The most common and emotionally meaningful use case. Black-and-white portraits of parents, grandparents, and older family members regain a sense of presence when colour is added. For family history projects, memorial displays, and printed keepsakes, colourisation transforms photos that felt distant into images that feel current and connected to the family's living memory.
Modernising historical archive material: Museums, historical societies, and archive projects use colourisation to make historical photography more accessible to modern audiences. War photography, documentary journalism, and historical portraiture all become more engaging to contemporary viewers when colour is added respectfully.
Bringing vintage advertising back to life: Old brand assets, vintage editorial photography, and historical marketing materials benefit from colourisation for use in modern brand storytelling, heritage campaigns, and anniversary content.
Creating meaningful gifts: Colourised versions of old family photos make genuinely meaningful gifts for parents, grandparents, and family members. Printed on canvas, framed as portraits, or included in family history books, the colourised versions carry emotional weight that black-and-white originals often lose over time. For creators combining colourisation with the wider restoration workflow to produce polished gift-quality output, our Best Apps to Restore Old Photos guide covers the full pipeline from damage repair through final print preparation.
Content creation source material: Old photos that would otherwise be unusable in modern content become usable when colour is added. Documentary creators, YouTube historians, editorial writers, and educational content producers use colourisation to make historical source material fit the aesthetic of contemporary content.
Personal photography from earlier eras: Photos from the film photography era, particularly personal shots taken between the 1950s and 1990s, benefit from colourisation when the original film was shot in black-and-white but the subjects and moments deserve contemporary presentation. Wedding photos, portrait sessions, and travel photography from earlier decades all fall into this category.
How to Use the Templix Image Colorizer
The workflow is straightforward. Most colourisations complete end to end in under a minute.
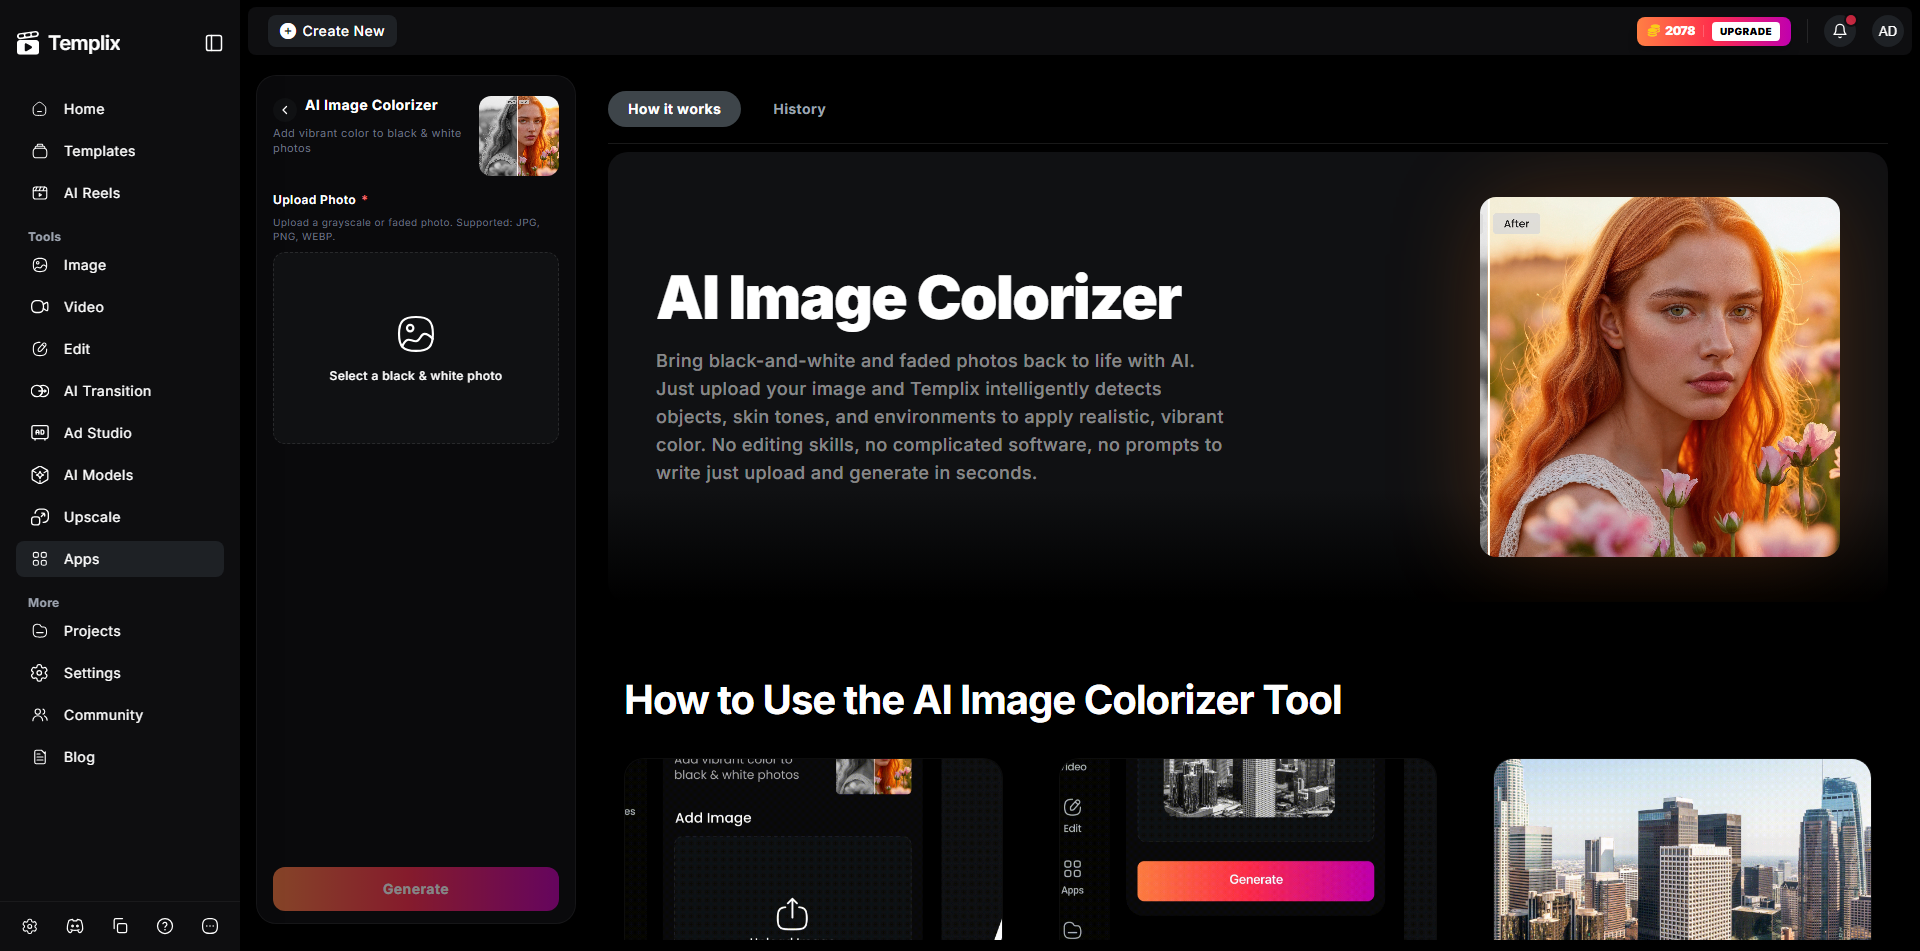
Step 1: Open the Templix Image Colorizer: Head to Templix and select the Image Colorizer from the app directory. New users can sign up for free credits without needing a card. Existing users can head straight to the app and start uploading.
Ai Image Colorizer
Step 2: Upload the black-and-white photo: Templix accepts common image formats including JPG, PNG, and WebP. For the best results, upload the highest-quality version of the photo you have. Higher-resolution source images consistently produce noticeably better colourisation results than compressed or low-resolution versions.
Step 3: Generate the colourised version: Click generate and let the AI process the image. Most colourisations complete within a few seconds. The tool returns the full-colour version alongside the black-and-white original so you can compare side by side.
Step 4: Refine if needed: If the first result has visible issues (unnatural colours in specific areas, colour bleeding between elements, or muted overall saturation), you can regenerate or use the wider Image Editor to adjust specific regions manually. Most photos work well on the first attempt, but complex scenes sometimes benefit from a second pass with different settings.
Step 5: Continue the workflow: Once the colourisation is complete, the same file can flow into other Templix tools without downloading and re-uploading. Restore damage, upscale for print, remove backgrounds, or continue any other cleanup work the photo needs.
Colourise Your First Photo Free
Tips for the Best Colourisation Results
A few habits produce noticeably better colourisation results than the default approach.
Start with the cleanest source photo you have: AI colourisation works with the detail and contrast in the source image, so cleaner sources produce cleaner results. If your source photo has scratches, dust, or damage, run it through the Photo Restoration tool first before colourising. Restoring first, then colourising, consistently produces better results than trying to colourise a damaged source.
Use higher-resolution scans when possible: A high-resolution scan of an old photo captures more detail for the AI to work with than a low-resolution scan or a phone photo of the printed original. If you have access to a flatbed scanner, use it. If not, use the highest resolution setting on your phone camera and shoot in even natural light rather than under harsh overhead lighting.
Understand what the AI can and cannot know: The AI predicts the most likely colours based on visual patterns, but it cannot know the actual colour of specific objects in your photo. If a family member wore a red dress in the photo, the AI may render it as blue if the visual patterns suggest blue is more likely for that particular garment shape. For photos where specific colour accuracy matters, treat the AI output as a starting point rather than a final answer.
Review skin tones carefully: Human faces are the element viewers scrutinise most, so a mismatched skin tone is the fastest way to make a colourised photo look artificial. If the skin tones in the first generation look off, regenerate and pay specific attention to whether the second attempt handles them better.
Consider the historical era: Photos from different decades often have different lighting characteristics, film sensitivities, and colour palettes that a modern colourisation may not perfectly reproduce. A 1920s photo colourised to look like 1980s colour photography may feel jarring. For period accuracy, some manual adjustment after the AI colourisation often produces better final results than pure AI output alone.
Keep the black-and-white original: Always save the original black-and-white version before colourising. The black-and-white photo has historical value in its own right, and having the original preserved lets you re-colourise later with newer models if the technology improves.
AI Colourisation vs Manual Colourisation
Traditional manual colourisation, done by a skilled digital retoucher in software like Photoshop, produces highly customised results tailored to the specific historical context of each photo. A skilled retoucher can research the specific colours of a family member's known outfit, cross-reference military uniforms from a specific period, or match documented colour references for historical buildings. That work takes hours per photo and costs meaningful money.
AI colourisation trades that specificity for speed and cost. The AI cannot research the historical context of your specific photo, but it can produce a plausible, natural-looking colourisation in seconds at a tiny fraction of the cost of manual work. For most family photos where historical colour accuracy of specific items matters less than the overall emotional impact of the colourised image, AI colourisation is the better choice.
The two approaches are not exclusive. Many photo restoration projects use AI colourisation as the starting point and then apply manual touch-ups to specific elements where accuracy matters. This hybrid approach preserves most of the speed and cost advantages of AI while still allowing the specific customisation that manual work enables where it genuinely adds value.
For deeper prompt structure that produces the cleanest results across every image generation and cleanup task, our JSON Prompting for AI Image Generation covers the structured approach that consistently outperforms free-text approaches.
Final Thoughts
AI colourisation is one of the most emotionally resonant use cases for AI image tools. The results carry real weight when they bring family photos, historical portraits, and vintage moments into a visual language that feels current and connected to how we see the world today.
The Templix AI Image Colorizer produces results realistic enough for family history projects, meaningful gifts, editorial content, and archive modernisation work, and it does so at a cost that makes the tool genuinely accessible rather than reserved for professional restoration budgets. Combined with the wider Templix creative suite for damage restoration, upscaling, and other cleanup work, it forms one of the most complete photo restoration workflows available in a single subscription.
Start with one old family photo that has emotional meaning to you. Colourise it. Look at the result. If it moves you, you already have your answer about whether the tool fits your workflow. Free credits on signup mean you can test the full workflow at no cost before committing to a paid plan.
Start Colourising Photos Free on Templix
Frequently Asked Questions
What is the Templix AI Image Colorizer?
The Templix AI Image Colorizer is an AI-powered tool that adds realistic colour to black-and-white and sepia photos. Upload an image, and the AI predicts appropriate colours for skin tones, clothing, foliage, sky, and other elements, then generates a full-colour version that looks natural rather than artificially tinted.
Is the Templix Image Colorizer free to use?
Yes. Templix offers free credits on signup so you can test the Image Colorizer and every other tool on the platform at no cost. Paid plans unlock higher credit volumes and priority processing for users colourising larger photo collections or working on ongoing family history projects.
Can I use colourised images commercially?
Yes. Images colourised through Templix are available for commercial use across editorial content, family history books, print reproductions, gift products, marketing campaigns, and any other commercial application. You retain full ownership of both your original photo and the colourised version.
What kinds of photos work best with AI colourisation?
Clear black-and-white or sepia photos with good tonal range produce the strongest colourisation results. Portraits, family photos, landscape shots, urban scenes, and historical images all work well. Extremely damaged, heavily degraded, or very low-resolution source images are the hardest cases, and often benefit from a photo restoration pass before colourisation.
How accurate are the colours in AI-colourised photos?
The AI predicts the most likely colour for each element based on visual patterns, which produces natural, plausible results but cannot recover the actual historical colours of specific items in the photo. For general family photos, the output is emotionally accurate. For photos where specific colour accuracy matters (military uniforms, sports kits, specific branded items), treat AI colourisation as a starting reference rather than a definitive historical record.
What image formats does the Templix Image Colorizer accept?
Templix accepts common image formats including JPG, PNG, and WebP. Higher-resolution source images consistently produce noticeably better colourisation results than compressed or low-quality versions, so upload the highest-quality copy of the file you have available.
Should I restore old photos before or after colourising?
Restore first, colourise second. Fixing scratches, damage, and fading before colourisation gives the AI cleaner information to work from, which produces significantly better colour results than trying to colourise a damaged source. For the complete restoration workflow, pair the Image Colorizer with the Templix Photo Restoration app.
Can I colourise very old photos from the 1800s or early 1900s?
Yes, though results depend heavily on the source photo's condition. Well-preserved photos from the 1800s can colourise beautifully. Damaged or faded photos from the same era often benefit from restoration first before colourisation. The AI works from the visual patterns in the source, so cleaner sources produce cleaner results regardless of the photo's actual age.
How does the Templix Image Colorizer compare to manual colourisation?
AI colourisation is dramatically faster and cheaper than manual work by a skilled retoucher. Manual colourisation produces more customised results tailored to specific historical accuracy but takes hours per photo and costs meaningful money. For most family photos where emotional impact matters more than exact colour accuracy of specific items, AI colourisation is the better choice. For high-value historical archive work where documentary accuracy matters, manual work still has a place.
What is the biggest reason to colourise an old photo?
Emotional connection. Black-and-white photos can feel emotionally distant to modern viewers, even when the subjects and moments captured are deeply meaningful. Adding colour brings those photos into the visual language contemporary viewers see the world through, which makes the moments they captured feel more present, more immediate, and more connected to living memory rather than to a distant historical past.

Eman Raza
Eman Raza is Templix's prompt engineering expert, writing practical guides on image and video generation that help users turn ideas into striking visuals