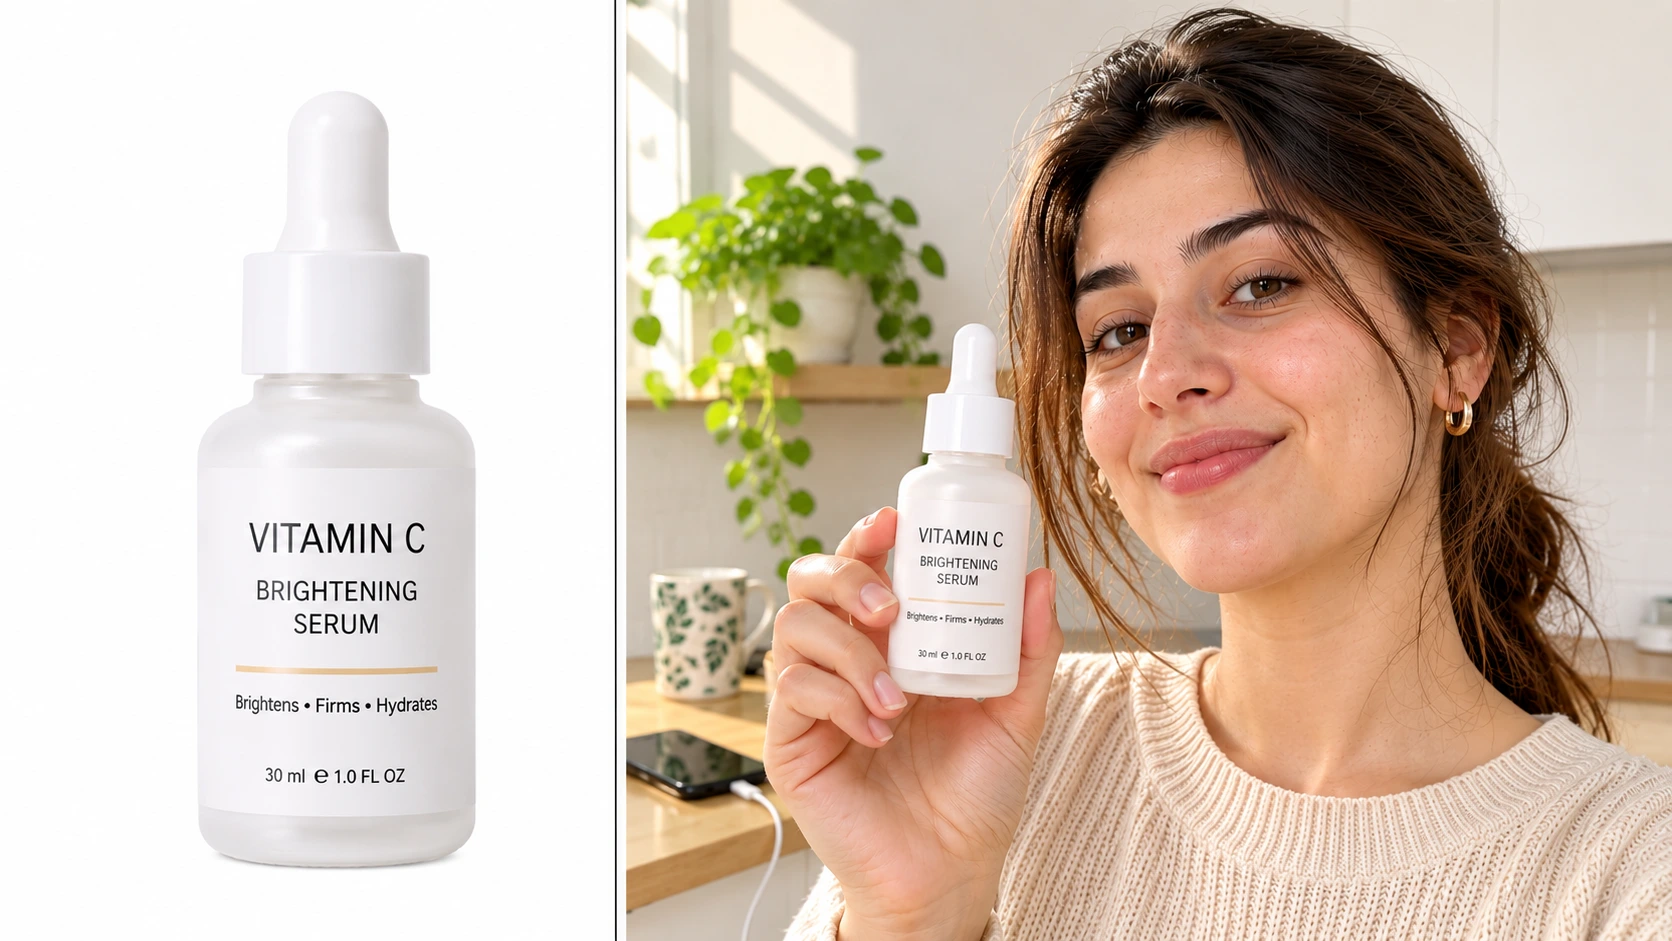
There are two kinds of product photo. The packshot: product on white, evenly lit, every detail visible. And the UGC photo: the product in someone's hand, on their counter, in their bag, lit by whatever window was nearby. The packshot tells the buyer what the product is. The UGC photo tells her what it is like to own it.
Ecommerce brands need both, and the second kind has always been the expensive one. A creator shoot, product shipped, a week's wait, three usable images out of forty. AI changes the economics: one packshot and a set of well-written prompts produce a full UGC photo set in an afternoon.
This guide is about doing it professionally: the shot list, the lighting, the framing and the props that make UGC product photography sell, and how to get all of it from an AI product image generator.
What Is UGC Product Photography?
UGC product photography is product imagery styled to look like a customer took it. Phone camera, real rooms, natural light, the product in use or in context. It is the still-image version of UGC video, and it fills Instagram feeds, Pinterest boards and the lifestyle slots in a product gallery.
The style has rules even though it looks casual: the product is identifiable, the setting matches the buyer's life, the light comes from one place, the framing is slightly imperfect on purpose. AI UGC product photography is making those choices in a prompt instead of on set.
Why UGC-Style Product Photos Outperform Packshots
They stop the scroll. Feeds are full of white-background renders. A product in a hand in a kitchen looks like a post, not an ad, and earns the half-second a packshot does not.
They show scale and use. A bottle in a palm shows size. A bottle on a bathroom shelf shows where it lives. A packshot shows neither.
They match the platform. Instagram, TikTok, Pinterest and marketplace galleries all rank lifestyle images above packshots in engagement, and some marketplaces rank listings with lifestyle images higher.
They build the brand's face. When the same creator appears in every product's photos, the brand gets a recognisable person without hiring one.
The packshot still matters: it is the first gallery image and the reference the AI works from. UGC photos are everything after it.
The 6-Shot List for Every Product
A professional set is a shot list, not a single image. These six cover a product gallery, a week of social posts and a Pinterest board.
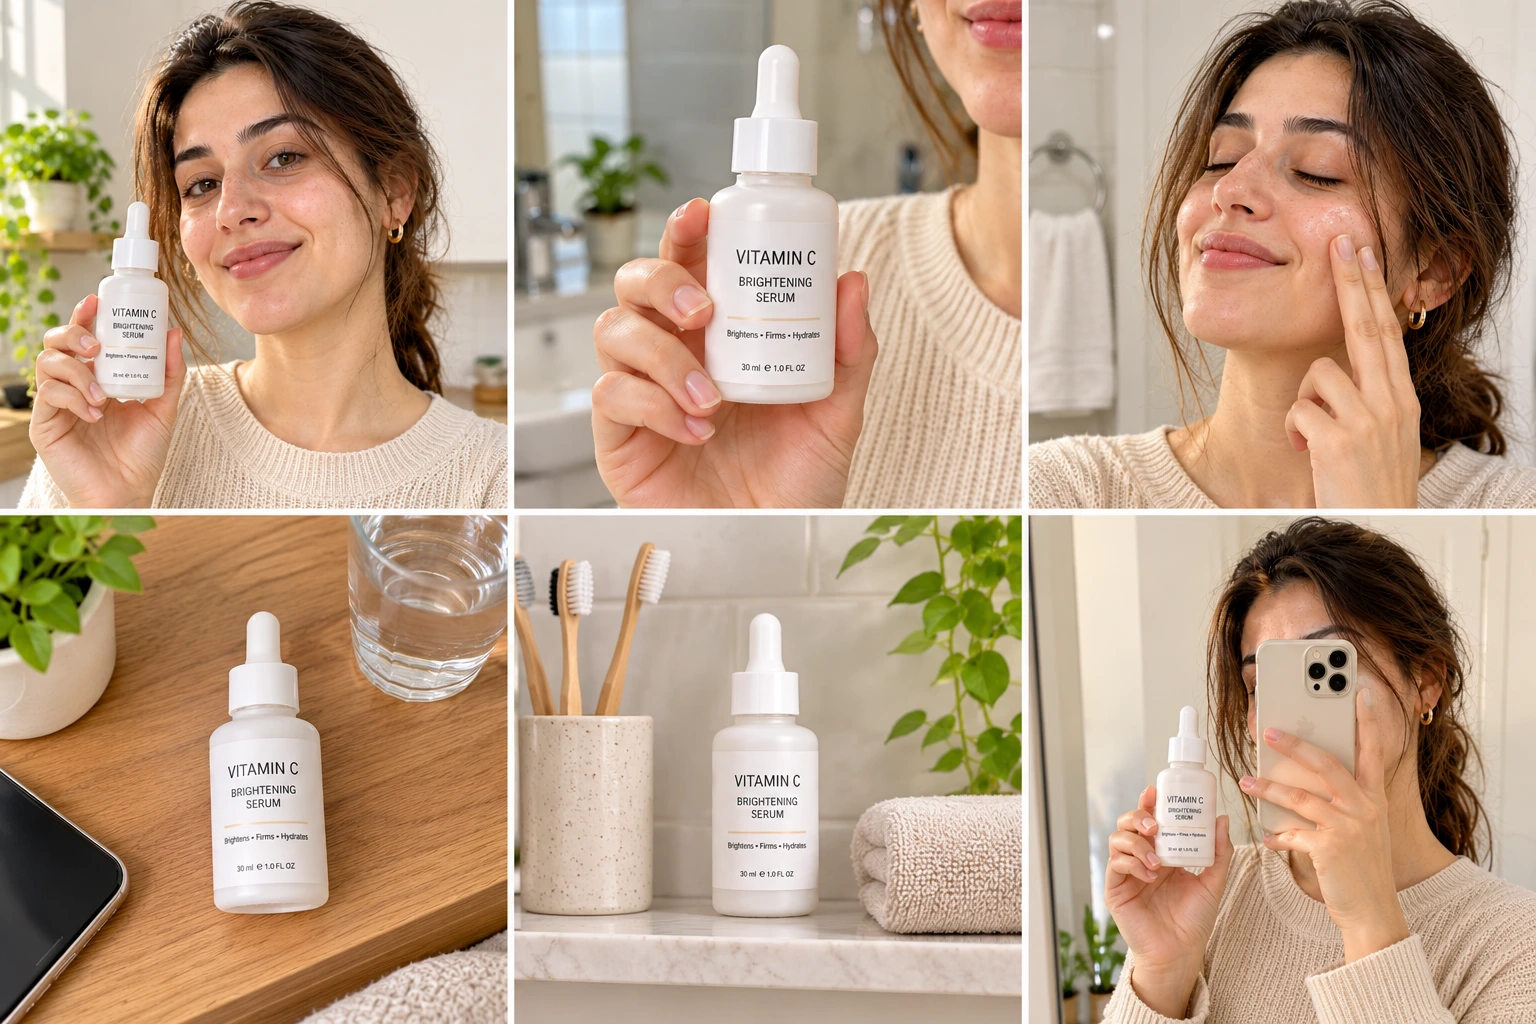
The six UGC product photography shots of one product: hold, close-up, in-use, flat lay, environment and mirror selfie
1. The hold
Creator holding the product at chest height, label to camera, face in frame. The thumbnail and the first carousel slide. The product is small in the frame, so the label has to be sharp.
2. The close-up in hand
Product filling most of the frame, fingers around it, face out of frame or cropped at the chin. Texture, cap, pump, label detail. The image buyers zoom into.
3. The in-use shot
The product doing its job. Cream on a cheek, a straw in a cup, a case going onto a phone. Hands and product, often no face. The proof image.
4. The flat lay
Product on a surface with everyday objects: a phone, keys, a glass of water, a book. No person. Slightly top-down. The product page gallery image and the Pinterest pin.
5. The environment shot
Product in its natural place, wider frame: on the bathroom shelf, the kitchen counter, the desk, the gym bag. Shows where it lives. Good for stories and carousels.
6. The mirror selfie
Creator photographing herself in a mirror with the product visible. The most "real" of the six because it is the format people actually post. Works for anything carried or worn.
The Rules That Make AI Product Photos Look Professional
These are the choices that separate a professional set from a plausible one.
Light: one source, one direction
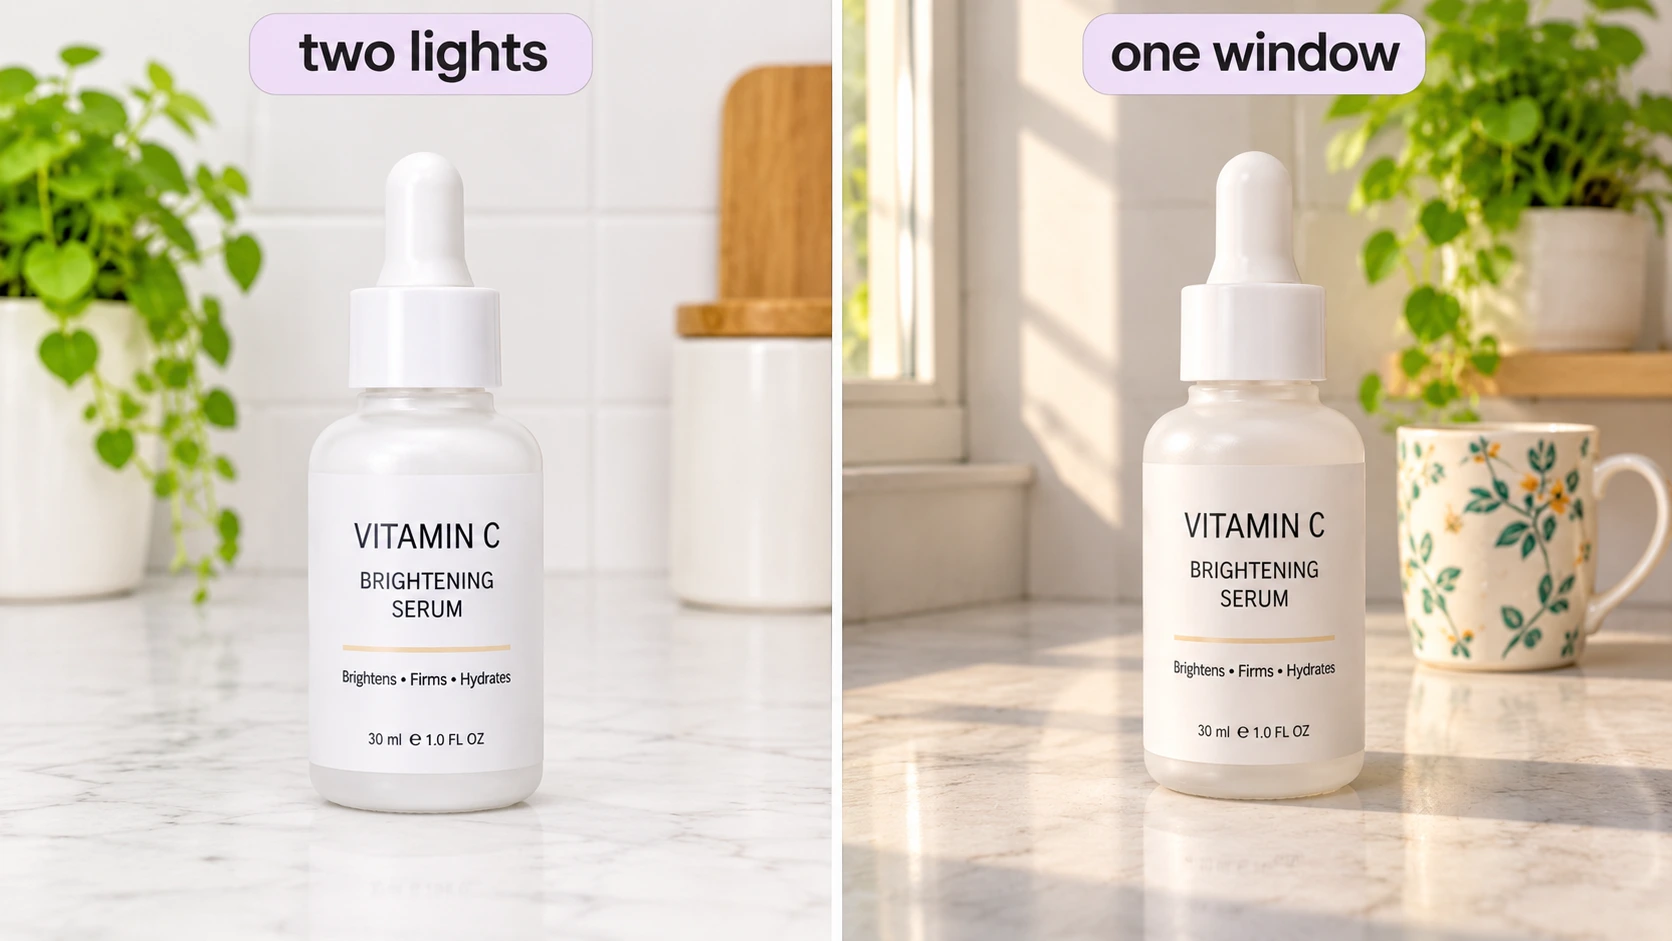
Comparison of flat two-light product lighting versus single window light in UGC product photography
Studio photography uses fill light to kill shadows. UGC photography does the opposite: one window or one lamp, named with a direction. Shadows are what make the image look taken rather than rendered. Two light sources is the fastest way back to a packshot look.
Camera: phone, not DSLR
Write the camera into the prompt: "phone front camera", "slightly off centre", "a little too close", "handheld tilt", "shallow depth of field". AI defaults to a tripod at the perfect distance; phone language pulls it toward how customers actually shoot.
Setting: lived-in, matched to the buyer
A spotless marble counter is a set. A counter with a mug and a cable is a kitchen. Add one or two everyday objects to every shot. And match the room to the buyer: a luxury serum lives on a clean bathroom shelf, a protein tub lives on a cluttered kitchen counter, a phone case lives on a desk next to a laptop.
Product: exact, readable, correctly sized
The packshot is the reference, so the packshot has to be clean: label readable, true colour, nothing touching it. Repeat "label exactly as in the reference, text sharp" in every prompt and give the real size when hands are involved. Wrong scale is the most common giveaway in AI product photos.
Creator: real skin, one face
Natural texture, a slight flush, one soft asymmetry. No beauty smoothing, ever. And the same creator across every shot and every product, from one saved reference image. A rotating cast of faces looks like stock photography. For the full method,
Composition: slightly wrong on purpose
In a UGC photo the product sits a little off centre, a hand crops at the frame edge, the background tilts a degree. Perfect composition reads as an ad.
How to Create UGC Product Photos with AI, Step by Step
Step 1: Prepare the packshot. Clean, white or neutral background, label readable, true colour. This is @image2 in every prompt.
Step 2: Set up the creator. Build one in the UGC character generator or pick one from the Community. Match her to the buyer. Save her image; it is @image1 for every photo. The rules for keeping her stable across shots are in how to create consistent AI UGC characters.
Step 3: Open the image generator. Go to the UGC image generator, attach @image1 and @image2, and write one prompt per shot from the list above.
Step 4: Generate three per shot, keep one. Check the label, the scale, the skin and the light direction, and keep the one that passes all four.
Step 5: Export by placement. 4:5 for Instagram feed and carousels, 9:16 for Stories and Pinterest, 1:1 for marketplace galleries. Make the hold shot in all three.
Step 6: Reuse for video. The same creator and product go into the UGC ad generator for a 15 second ad and the UGC video generator for organic clips, so the face in the photos is the face in the videos.
Prompts for the 6-Shot List
Attach the creator as @image1 and the packshot as @image2. Every prompt ends with the same block.
The hold
@image1 holds @image2 at chest height, label to camera, in a bright
kitchen, phone front camera, slightly off centre, window light from the
left, mug and plant out of focus behind. Natural skin texture, small
relaxed smile. Label exactly as in the reference, text sharp.
No studio lighting, no beauty smoothing, no perfect symmetry, not a
render, not a stock photo.
The close-up in hand
Close-up of @image1's hand holding @image2, product filling most of the
frame, fingers wrapped naturally, face cropped out at the chin, bathroom
counter blurred behind, morning window light from the right, phone
camera depth of field. A 30ml bottle, about the length of her palm.
Label exactly as in the reference, text sharp.
No studio lighting, not a render.
The in-use shot
@image1 applying product from @image2 to her cheek with two fingers,
eyes closed, bathroom mirror out of focus behind, window light from the
left. A little product visible on the fingertips. Natural skin texture.
No beauty smoothing, no studio lighting, not a render.
The flat lay
@image2 standing on a wooden bedside table next to a phone, a glass of
water and a folded paperback, morning light through sheer curtains,
slightly top-down phone camera angle, shallow depth of field, small
window-frame shadow across the table, nothing styled.
Not a product render, not a studio shot.
The environment shot
@image2 on a bathroom shelf between a toothbrush cup and a folded
towel, mirror edge visible, wider frame, soft daylight from a window
out of frame to the left, slightly tilted phone camera angle, real
bathroom with a little clutter. Label readable.
No studio lighting, not a render.
The mirror selfie
@image1 taking a mirror selfie, phone partly covering her face,
holding @image2 in her other hand at waist height, bedroom mirror with
a lamp and clothes rail visible, warm evening light, slight blur at
the edges, phone screen reflection visible. Natural pose, real skin.
No studio lighting, no filter, not a render.
Mistakes That Make UGC Product Photos Look Fake
Two light sources. Fill light is for packshots. One window or one lamp.
Product dead centre on a clean surface. Add an object, move it off centre.
Wrong scale in the hand. State the real size in the prompt.
Label drift. Repeat "label exactly as in the reference" and reject any image where it changed.
Glass skin. Texture in every prompt with a face in it.
Same room for all six shots. Six shots in one kitchen is a set. Move between rooms.
A new creator per product. One saved reference, every product.
Generating one and shipping it. Three attempts, keep one.
Where to Use UGC Product Photos
Product page gallery. Packshot first, then hold, close-up, in-use, flat lay. Buyers who reach the lifestyle images convert at a higher rate than buyers who only see the packshot.
Instagram carousels. Hold, close-up, in-use, flat lay, mirror selfie: five slides, one product, one creator.
Pinterest. Flat lay and environment shot as 2:3 pins with the product name in the title.
Meta and TikTok static ads. The hold shot and the in-use shot, tested against each other.
Marketplace listings. Hold and flat lay added after the packshot. Listings with lifestyle images get more clicks.
Email. Flat lay as the header, product name as the subject line.
For the broader picture of what an AI UGC image generator can do beyond product sets, see AI UGC image generator: create realistic product photos.
Frequently Asked Questions
What is UGC product photography?
Product imagery styled to look like a customer took it: phone camera, real rooms, natural light, the product in a hand or in use. It fills social feeds and the lifestyle slots in product galleries, and it outperforms white-background packshots on every social platform.
Can AI create professional product photos?
Yes, when the prompts carry the choices a photographer would make: one light source with a direction, phone camera language, a lived-in setting matched to the buyer, the product's real size, and a "no" list that forbids studio lighting and smoothing. Without those, AI defaults to a render.
What photos does an ecommerce product need?
Six: the hold, the close-up in hand, the in-use shot, the flat lay, the environment shot and the mirror selfie. Together they cover the product page gallery, carousels, Pinterest and static ads.
How do I keep the product accurate in AI photos?
Use a clean packshot as the reference, repeat "label exactly as in the reference, text sharp" in every prompt, state the product's real size when hands are involved, and reject any output where the label or shape changed.
How much does AI UGC product photography cost?
Each attempt is well under a dollar and a usable image takes about three attempts, so a full six-shot set for one product is a few dollars. A creator shoot for the same set is $150 to $500 plus product and shipping, with a one to two week turnaround.

Usman Khalid
Usman Khalid writes Templix's design and product content, covering API workflows and team collaboration to help developers and creators build smarter, faster experiences.